Use this dialog to edit the location, policy, and contact information for the valuation.
- In the policy information panel click the Edit button.
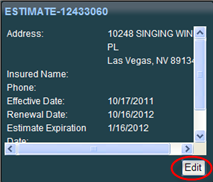
The Edit Policy Information dialog opens.
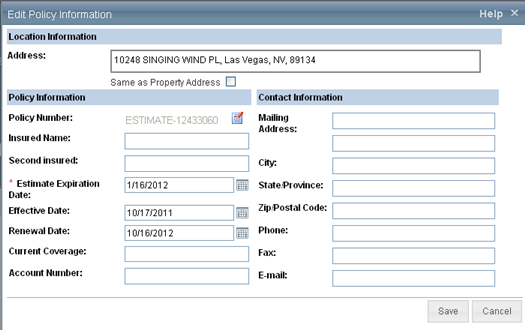
- Enter the desired information. Required fields are indicated with an asterisk.
- Use the calendar icon (
 ) to select dates from a calendar for fields requiring a date.
 - Click Save.
Definitions for policy information fields:
This is the address of the property being valued.
You can enter up to 30 characters.
Note: If the insured’s contact information is the same as the insured property address, select the Same as Property Address check box. If the contact information is different, do not select the check box and enter the contact address information into the fields that are displayed.
Select this check box to copy the location information to the contact information. If the contact information is different from the property location information, do not select this check box.
This is the policy identifier assigned to the valuation.
When creating a new valuation, an estimate number (for example, Estimate-1000) is automatically filled in for you.
To enter the policy number click the Assign Policy Number icon ( ![]() ).
).
When entering the actual policy number, you can enter up to 30 characters. You can use symbols like dashes, apostrophes, quotes, and so forth.
Note: The policy number is a required field and must be unique.
This is the name of the owner of the residence being valued. You can later use the insured name to locate the valuation when you want to open, view, or delete it.
You can enter up to 30 characters for each insured. If the policy has two insureds, you can enter the second insured name in the Second Insured Full Name field.
If the policy has two insureds, you can enter the second insured name in the Second Insured Full Name field.
This is the date the estimate will expire and be removed from the system if the estimate has not been assigned a policy or record number. Typically this date is set to 90 days from the creation of the valuation.
Click the Calendar icon ( ![]() ) to select the date from a calendar.
) to select the date from a calendar.
This is this is the date when the policy is put into effect.
Click the Calendar icon ( ![]() ) to select the date from a calendar.
) to select the date from a calendar.
This is this is the date when the policy is up for renewal.
Click the Calendar icon ( ![]() ) to select the date from a calendar.
) to select the date from a calendar.
This is the current coverage A amount for the policy.
- Coverage A (Dwelling) is the part of the dwelling policy that covers the dwelling and attached additions (for example, screened porches and breezeways, attached garage, and so on.). Coverage A also covers the materials and supplies for the construction, alteration, or repair of the residence.
Enter the current dollar amount (up to $999,999,999) of coverage A for the policy. This amount prints in the body of the report. Note: Do not enter dollar signs or commas.
This is the account number or identifier assigned to the policy.
You can enter up to 20 characters.
This is the insured’s address if different from the property being valued.
You can enter up to 30 characters. If the address requires two lines, use the field directly below the Mailing Address field to enter the second line.
This is the insured’s city if different from the property being valued.
You can enter up to 30 characters.
This is the insured’s state/province if different from the property being valued.
You can enter the state (province in Canada) of the insured by typing its two-character abbreviation.
Related Topics:
This is the insured’s ZIP/postal code if different from the property being valued.
For a U.S. address, you must enter a valid 5-digit ZIP code. For a Canadian address, you must enter a valid 6-character alphanumeric Canadian postal code.
This is the insured's home phone number.
You can enter up to 12 characters.
Enter the fax number for the contact person.
Enter the e-mail address for the contact person.
Related Topics:
Use the Edit Building Information dialog to enter or edit information about the building, including sections.
To edit building information:
- In the Building Information panel, click the Edit button.
The Edit Building Information dialog appears.
- Enter the building information in the appropriate fields. Required fields are indicated with an asterisk. Certain fields include the
 Interactive Help feature.
When you enter information in the Edit Building Information dialog, RCT provides an interactive help feature for certain fields. Interactive help automatically enters pertinent information into the building information dialog after you make a selection from the help topic.
Important: If you select the help topics from other locations within the help system this feature is not available. It only appears when you select help from the fields in the Edit Building Information dialog.
Interactive help works with the Site Access, Style, Construction Type, and Perimeter fields.
To use interactive help with the Style field:
- On the Edit Building Information dialog, click Style to display the help topic that shows all the available home styles.
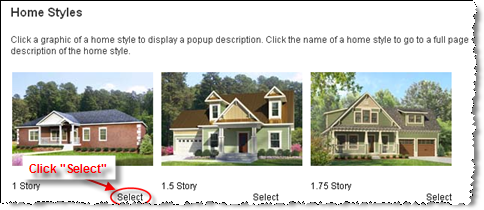
- Underneath each home style graphic is a "Select" link. Pick the home style you want and click Select. All pertinent information for that style is automatically entered into RCT.
To use interactive help with the Site Access, Construction Type, or Perimeter fields:
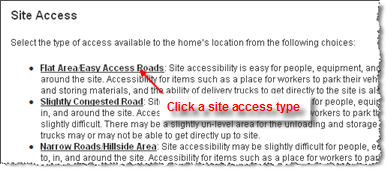
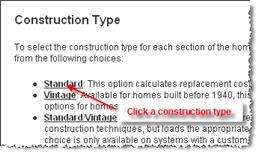
- On the Edit Building Information dialog, click the field name, for example "Site Access" to display the help topic.
- Click the underlined name of the definition you want to use (for Perimeter, click a graphic). The pertinent information is automatically entered into RCT.
Interactive Examples:
Site Access: Click the type of site access and all the relevant information is automatically entered into RCT.
Construction Type: Click the construction type and all the relevant information is automatically entered into RCT.
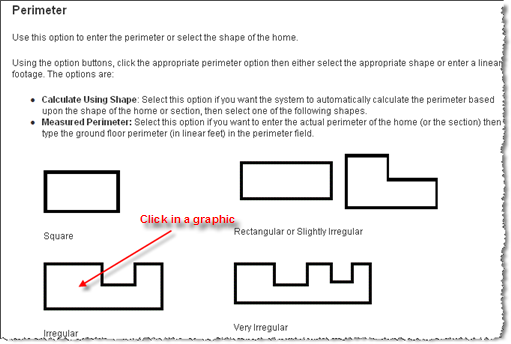
Perimeter: Click the graphic of the perimeter shape of the home and the information is automatically entered into RCT.
- On the Edit Building Information dialog, click Style to display the help topic that shows all the available home styles.
- If you need to add a section click Add a Section or Wing at the bottom of the dialog.
- Click Save to save and update the information. If any errors exist they will be displayed after clicking Save.
Definitions for building information fields:
For the main home this defaults to "Main Home" and is not editable. If you add sections, each section can have a unique name.
This is the number of family units (1 through 4 for the U.S. or 1 through 6 for Canada) in the residence. The number of families (along with the ZIP/postal code, year built, style and home size) is used in the cost calculations and to set the default material selections for the home.
Select the appropriate number of families from the drop-down list. The default is 1 family.
Select the type of access available to the home’s location from the following choices:
- Flat Area/Easy Access Roads: Site accessibility is easy for people, equipment, and materials to get to, in, and around the site. Accessibility for items such as a place for workers to park their vehicles, a level area for unloading and storing materials, and the ability of delivery trucks to get directly to the site is also relatively easy.
- Slightly Congested Road: Site accessibility may be slightly difficult for people, equipment, and materials to get to, in, and around the site. Accessibility for items such as a place for workers to park their vehicles may also be slightly difficult. There may be a slightly unlevel area for the unloading and storage of materials and delivery trucks may or may not be able to get directly up to the site.
- Narrow Roads/Hillside Area: Site accessibility may be slightly difficult for people, equipment, and materials to get to, in, and around the site. Accessibility for items such as a place for workers to park their vehicles may also be slightly difficult. Due to site slope, storage and unloading of materials requires accommodations not observed in level sites. Materials and delivery trucks may not be able to get directly to the site.
- Difficult Access/Steep Terrain: Site accessibility may be difficult for people, equipment, and materials to get to, in, and around the site. Accessibility for items such as a place for workers to park their vehicles may be difficult and delivery trucks may have difficulty getting to the site. In some cases, materials may need to be unloaded into smaller vehicles and delivered up to the site, then unloaded again. This condition is also found with mountain construction.
- Mountain Region: Accounts for the building costs in mountain resort areas where costs are high and site access is more challenging than standard conditions. These two factors combined comprise the mountain region conditions, which accounts for the labor rates and material costs reflecting the higher demand for labor and material in addition to added challenges involved in material delivery in these areas.
Note: If a mountain region home is built on a hillside, you should enter an appropriate hillside foundation percentage on the Building Information dialog, and enter a hillside slope using the drop-down list. - Island Access/Short Distance (1 mile or less): Site accessibility for people, equipment, and materials to get to, in, and around the site is by ferryboat (one mile or less) or by limited roadways (no distance restrictions). The down time of the workers and delivery trucks must be taken into account when dealing with island construction.
- Island Access/Long Distance (1 mile or more): Site accessibility for people, equipment, and materials to get to, in, and around the site is by ferryboat only. The down time of the workers and delivery trucks must be taken into account when dealing with island construction.
- Elevator Access: Site accessibility for condos, apartments, and co-op units is made through elevator access. To get people, equipment, and materials to, in, and around the site, elevators must be used. Delivery trucks must be unloaded and materials must be loaded and then unloaded from the elevator. The additional labor must be taken into account when dealing with elevator access.
- Isolated Rural Area: People, equipment, and materials are not locally available. Remote sites are difficult to access and will increase the construction cost.
Related topics:
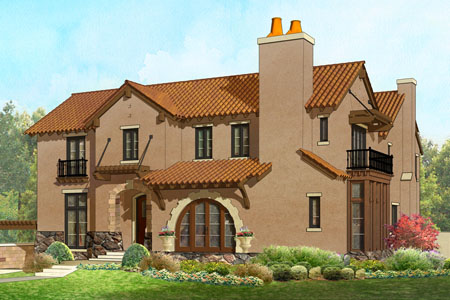
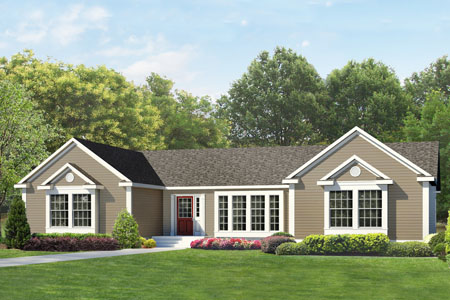
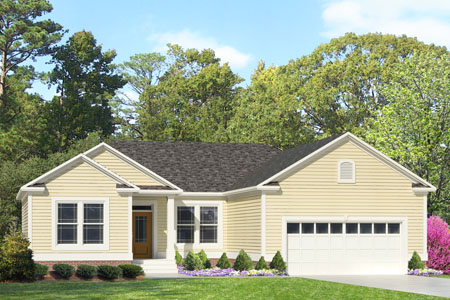
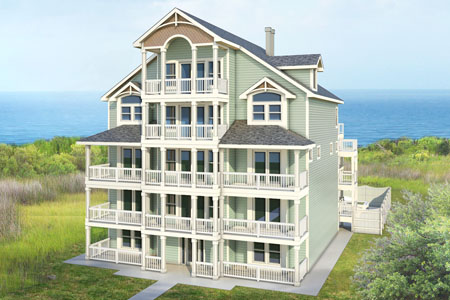
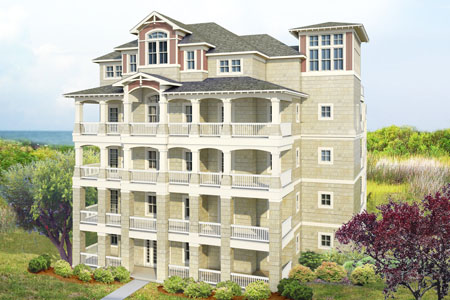
Click a home style graphic to display a popup description. Click the name of a home style to go to a full page description of the home style.

A 1.75 story is a residence with one full level of living area and a second level that is characterized by a steep roof slope and dormers (which project from the roof and have windows on their fronts). Because of the roof design, the area of the second floor is usually 80% of the ground floor area. Sometimes referred to as a "salt box". | ||||
|
|
|
|
|
|
| |||
|
|
|
|
|
|
| 
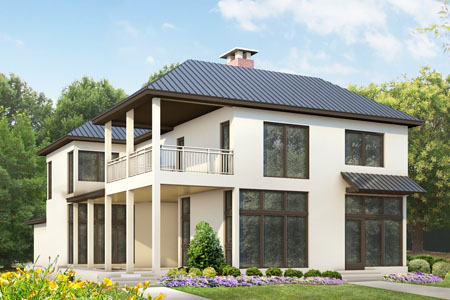
A contemporary home is a residence designed from combinations of square and rectangular geometric patterns blending both interiors and exteriors. Contemporary residences typically contain multiple roof lines where roofs are flat or flat with a slight pitch (shed roof). Exteriors are often plain with little or no ornate trim, typically with extensive use of glass. The designs of these residences are more modern and less traditional. They typically have wide open interiors with fewer partitions than other traditional home styles. | ||
|
|
|
|
|

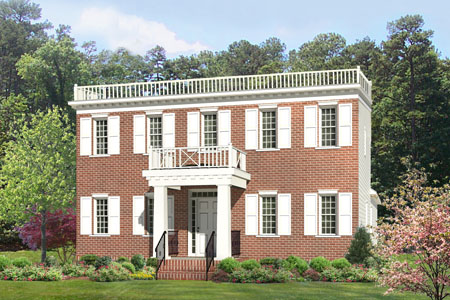
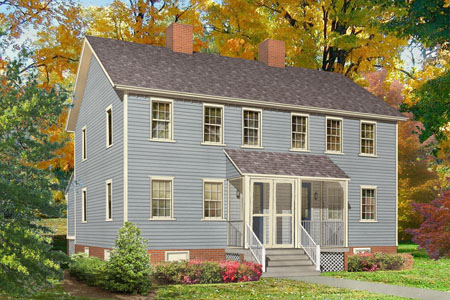
A Federal Colonial is typically a 2 story home that is generally found in the Eastern part of the United States. It is characterized by its flat roof and ornate wood trim along the exterior roof line. It is generally square in design and is typically an early 20th century or older structure. Exterior walls are normally painted wood. Also known as Union Colonial. |
|
| 
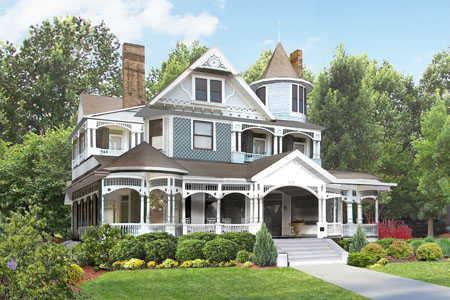
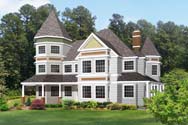
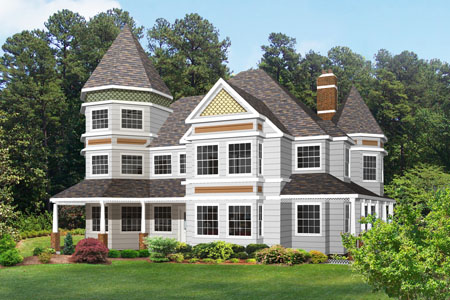
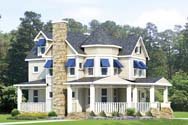
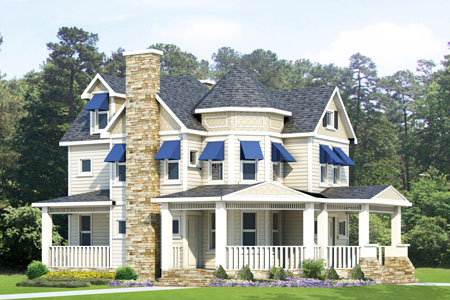
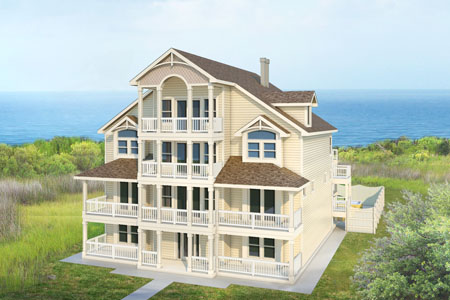
An ornate Victorian is a residence with 2-1/2 or 3 stories of living area, typical of the architectural style in the late 19th century. Ornate Victorians typically have extensive use of elaborate exterior and interior finishes and trims including 36" of gingerbread on at least three lines of the house. They also include bay windows, turrets, tall chimneys and extensive porches. Use the Victorian style for less extensive use of finishes and trim including, typically, 18" gingerbread. | |
|
|
|
|
|
|
| 
A Victorian is a residence with 2-1/2 or 3 stories of living area, typical of the architectural style in the late 19th century. Victorians typically have elaborate exterior and interior finishes and trims including 18" of gingerbread on at least three lines of the house. They also include bay windows, turrets, tall chimneys and extensive porches. For Victorians with extensive use of finishes and trims, use the ornate Victorian style, which typically has 36" gingerbread. | ||
|
|
|
|
|
|
| 
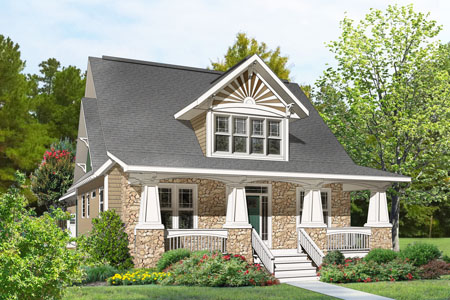
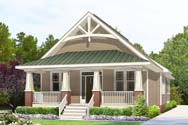
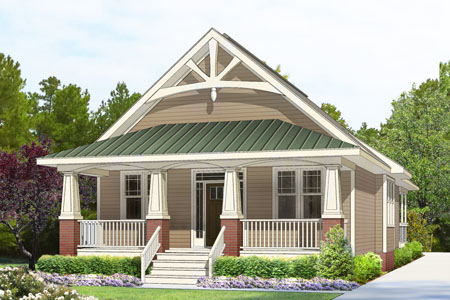
A bungalow is a small, one-story house popular in the early 20th century typically with a front porch (either open or enclosed). The most common bungalows, including California bungalows, have wood siding or wood shingle exterior walls and wood shingle roofs. Large roof overhangs are common and walls flow front to back. | ||
|
|
|
|
|
| 
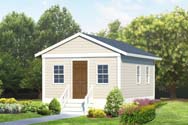
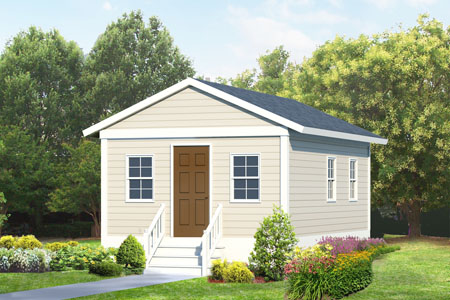
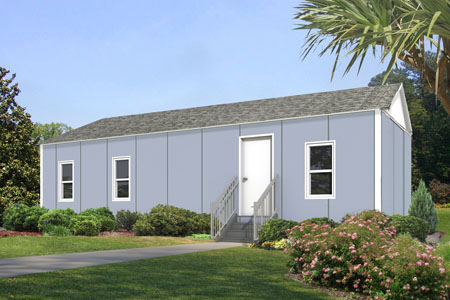
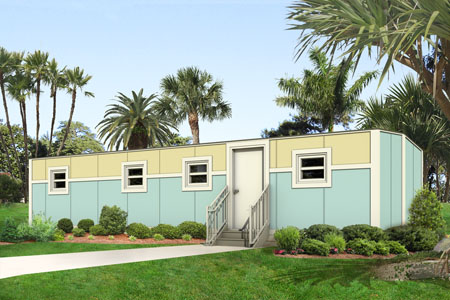
Subsidized or substandard is housing that resembles barracks or other low-grade habitational structures found more often as part of a government facility or government subsidized facility. These homes have limited trim, if any, and minimal partitions. They typically comply with federal government codes but not necessarily standard building codes. |
| ||
|
|
|
|
|

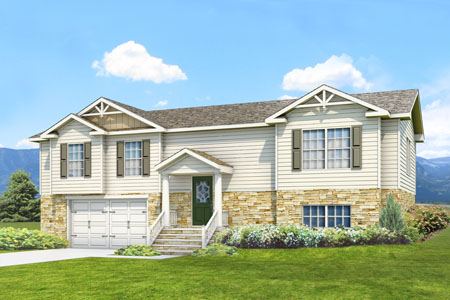
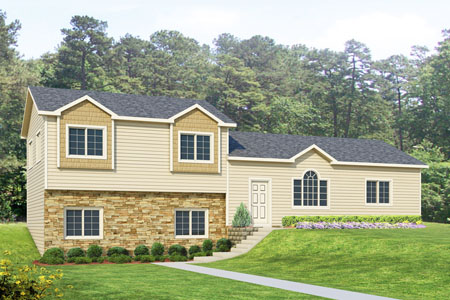
A bi-level or split foyer is a residence with two levels of living area, with the lower level being completely finished and normally partially below grade (with no basement below it). The entrance is a split-foyer entrance. Note: Bi-level, raised ranch, and split foyer styles could have a portion or the entire lower level unfinished. To account for this, enter the Percentage (%) of Lower Level Unfinished, using a percentage between 0 and 100%. |
| 
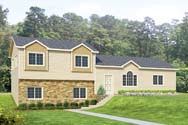
A back split is a residence that is divided front to back with three levels of finished living area: lower level, intermediate level, and upper level. The lower level is immediately below the upper level as in a two-story residence. The intermediate level, adjacent to the other levels, is built on a grade approximately one-half story higher than the lower level. Back split homes have a split roof design. Use the Split level style for homes that are divided side to side. |
| 
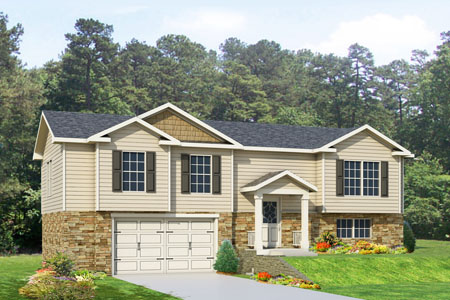
A raised ranch is a residence with two levels of living area, with the lower level being completely finished and normally partially below grade (with no basement below it). The entrance is a split-foyer entrance. Note: Bi-level, raised ranch, and split foyer styles could have a portion or the entire lower level unfinished. To account for this, enter the Percentage (%) of Lower Level Unfinished, using a percentage between 0 and 100%. |
|
|
|
|
|
| 
A split level or tri-level is a residence that is divided side to side with three levels of finished living area: lower level, intermediate level, and upper level. The lower level is immediately below the upper level as in a two-story residence. The intermediate level, adjacent to the other levels, is built on a grade approximately one-half story higher than the lower level. Split-level residences have a split roof design. Use the Back Split style for homes that are divided front to back. |
| 
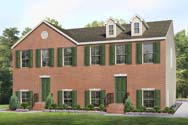
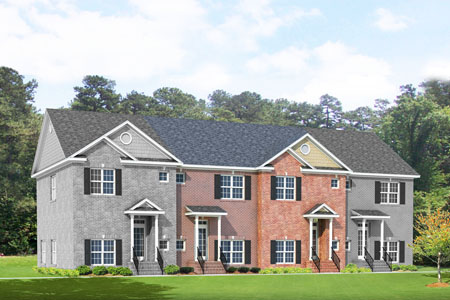
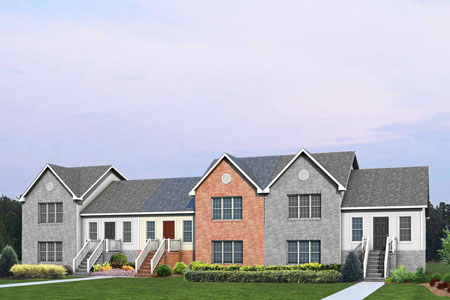
A row house is an attached single-family residence. Each row house unit is one of a group of two or more units adjoined by common walls. Such units never have units above or below, always have individual exterior walls, and never have more than two walls common with adjacent units. An end unit is at the end of a row with only one other unit adjacent to it. | |
|
|
|
|
|

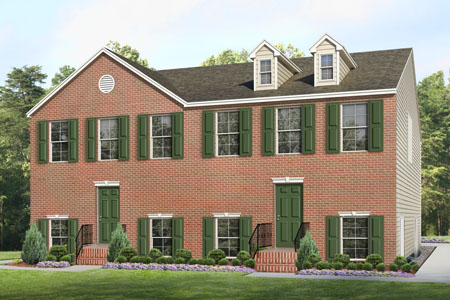
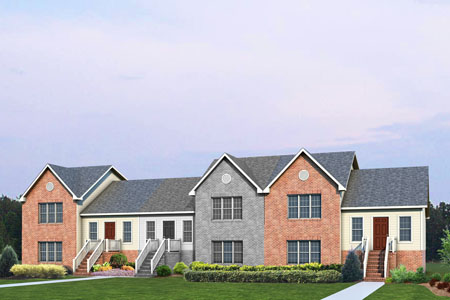
A row house is an attached single-family residence. Each row house unit is one of a group of two or more units adjoined by common walls. Such units never have units above or below, always have individual exterior walls, and never have more than two walls common with adjacent units. A center unit is inside a row with other units on either side. |
| 
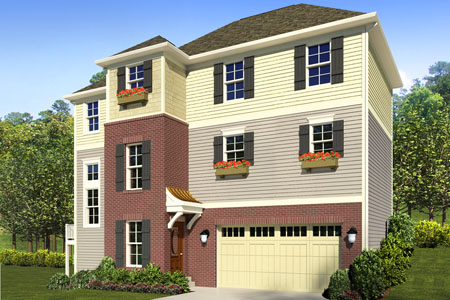
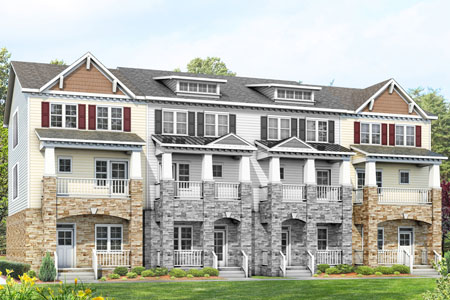
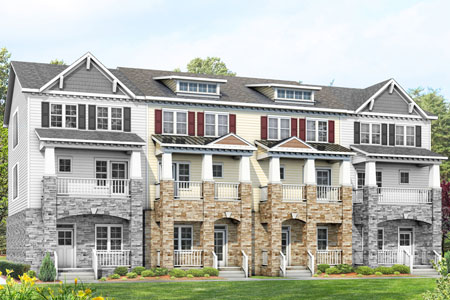
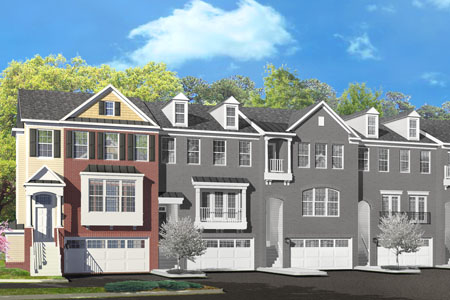
A town house is an attached single-family residence. Each town house unit is one of a group of two or more units adjoined by common walls. Such units never have units above or below, always have individual exterior walls, and never have more than two walls common with adjacent units. An end unit is at the end of a row with only one other unit adjacent to it.
|
| 
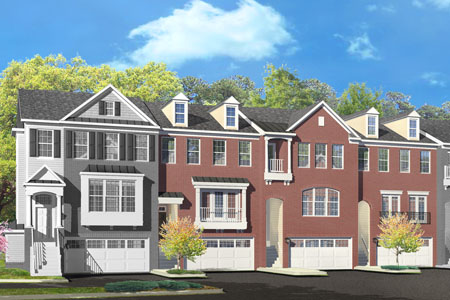
A town house is an attached, single-family residence. Each town house unit is one of a group of two or more units adjoined by common walls. Such units never have units above or below, always have individual exterior walls, and never have more than two walls common with adjacent units. A center unit is inside a row with other units on either side.
|
|
|
|
|
|

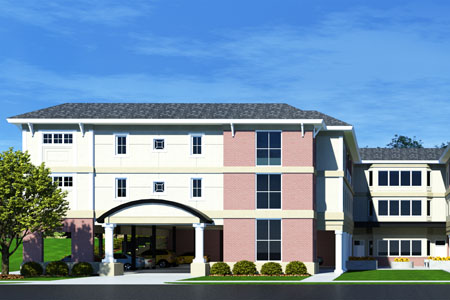
This style is used to calculate the costs typically covered by a condo or co-op policy. The costs include the inside features like partition material (for example, drywall, plaster, and so on), wall, floor and ceiling coverings, kitchen, and baths. It does not and should not include the foundation, exterior walls, roof, framing, or detached structures. Note: If you choose this style, do not enter any information on the exterior wall, roofing, or foundation pages. The only exception to this would be if you have a finished basement. Enter a finished basement on the Materials panel. |
| 
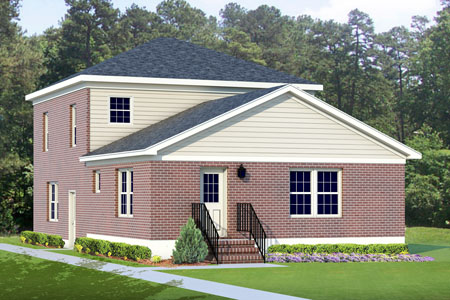
A bi-level/row end is an attached single-family residence with two levels of living area, with the lower level being fully finished and normally partially below grade (with no basement below it). The entrance is a split-foyer entrance. Each bi-level rowhouse unit is one of a group of two or more units joined by common walls. Such units never have units above or below, always have individual exterior walls and never have more than two walls common with adjacent units. An end unit is at the end of a row, with only one other unit adjacent to it. This style is especially common throughout Canada. |
| 
A bi-level/row center is an attached single-family residence with two levels of living area, with the lower level being fully finished and normally partially below grade (with no basement below it). The entrance is a split-foyer entrance. Each bi-level rowhouse unit is one of a group of two or more units joined by common walls. Such units never have units above or below, always have individual exterior walls and never have more than two walls common with adjacent units. A center unit is inside a row with other units on either side. This style is especially common throughout Canada. |
|
|
|
|
|

A tri-level/row end is an attached single-family residence with three levels of finished living area: lower level, intermediate level, and upper level. The lower level is immediately below the upper level as in a two-story residence. The intermediate level, adjacent to the other levels, is built on a grade approximately one-half story higher than the lower level. Each tri-level rowhouse unit is one of a group of two or more units joined by common walls. Such units never have units above or below, always have individual exterior walls, and never have more than two walls common with adjacent units. An end unit is at the end of a row, with only one other unit adjacent to it. This style is especially common throughout Canada. |
| 
A tri-level/row center is an attached single-family residence with three levels of finished living area: lower level, intermediate level, and upper level. The lower level is immediately below the upper level as in a two-story residence. The intermediate level, adjacent to the other levels, is built on a grade approximately one-half story higher than the lower level. Each tri-level rowhouse unit is one of a group of two or more units joined by common walls. Such units never have units above or below, always have individual exterior walls, and never have more than two walls common with adjacent units. A center unit is inside a row, with other units on either side. This style is especially common throughout Canada. |
| |
|
|
|
|
|

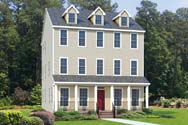
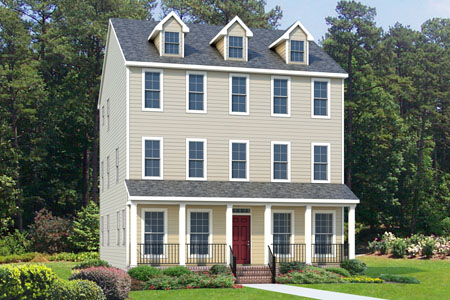
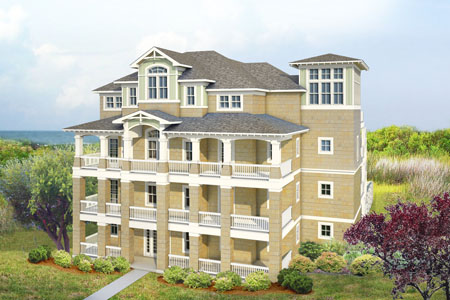
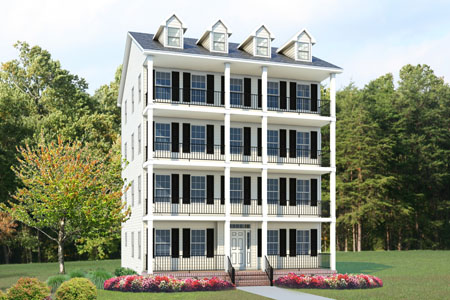
A 3.75 story is a residence with three full levels of living area and a fourth level that is characterized by a steep roof slope and dormers (which project from the roof and have windows on their fronts). Because of the roof design, the area of the fourth floor is usually 80% of the ground floor area. |
|
| ||
|
|
|
|
|
|
| 
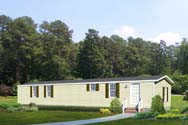
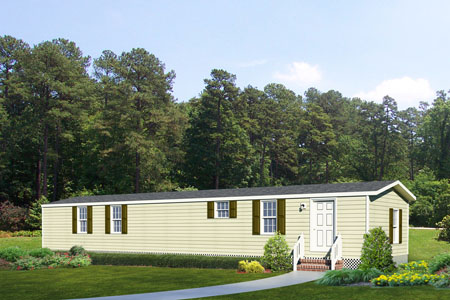
A manufactured home is a single-family house constructed entirely in a controlled factory environment and built to the federal Manufactured Home Construction and Safety Standards (better known as the HUD Code). Single-wide manufactured homes are residential structures that consist of one unit that is 8 to 18 feet wide and up to 80 feet long, built and towed to the site. These units are delivered complete with little to do before they can be inhabited. The homes simply need to be set on piers or a basement and have the water, sewer, and electrical connected. Additional services are often done when the home is first set, such as installing skirting connecting the air conditioner, and removing the hitch. If more than one story, a crane is used to stack one unit on top of the other. They are built on steel undercarriages with necessary wheel assemblies for transporting to permanent or semi-permanent sites. The wheel assembly and hitch can be removed once the home has been set. The steel undercarriage, however, will remain intact since it is incorporated into the framing of the home. A red, permanently attached, HUD label must be attached to each transportable section of the home. The label is found on what would be considered the rear exterior of the home when in transit. Note: Setup, delivery, and installation fees are not included in the costs. They must be added using the appropriate Setup Fees material selection under Exterior Features. Mobile Manufactured Housing is not:
| ||
|
|
|
|
|

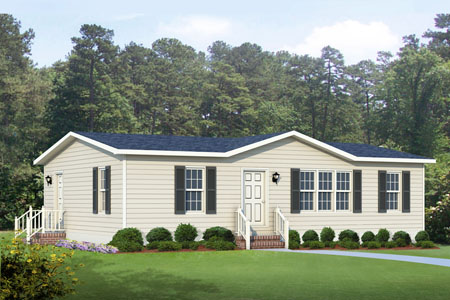
A manufactured home is a single-family house constructed entirely in a controlled factory environment and built to the federal Manufactured Home Construction and Safety Standards (better known as the HUD Code). Multi-wide homes are residential structures that consist of two or more single units that are joined together at the site to make one living unit. The assembled homes are typically 24, 28 or 32' wide and can be as long as 80' however 42' and 50' are typical. Once delivered, the homes need to be bolted together, set on piers or a basement and have the water, sewer, and electrical connected. If more than one story, a crane is used to stack one unit on top of the other. Additional services are often done when the home is first set such as installing skirting, connecting the air conditioner, and removing the hitch and wheel assemblies. They are built on steel undercarriages with necessary wheel assemblies for transporting to permanent or semi-permanent sites. The wheel assembly and hitch can be removed once the home has been set. The steel undercarriage, however, will remain intact since it is incorporated into the framing of the home. A red permanently attached HUD label must be attached to each transportable section of the home. The label is found on what would be considered the rear exterior of the home when in transit. Note: Setup, delivery, and installation fees are not included in the costs. They must be added using the appropriate Setup Fees material selection under Exterior Features. Mobile Manufactured Housing is not:
|
| 
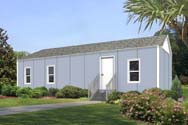
A manufactured home is a single-family house constructed entirely in a controlled factory environment and built to the federal Manufactured Home Construction and Safety Standards (better known as the HUD Code). Single-wide starter manufactured homes are basic residential structures that consist of one unit, 8 to 18 feet wide, up to 80 feet long, built and towed to the site. Distinguishing characteristics of the starter homes are:
These units are delivered complete with little to do before they can be inhabited. The homes simply need to be set on piers or a basement and have the water, sewer, and electrical connected. Additional services are often done when the home is first set, such as installing skirting, connecting the air conditioner, and removing the hitch. If more than one story, a crane is used to stack one unit on top of the other. They are built on steel undercarriages with necessary wheel assemblies for transporting to permanent or semi-permanent sites. The wheel assembly and hitch can be removed once the home has been set. The steel undercarriage, however, will remain intact since it is incorporated into the framing of the home. A red, permanently attached, HUD label must be attached to each transportable section of the home. The label is found on what would be considered the rear exterior of the home when in transit. Note: Setup, delivery, and installation fees are not included in the costs. They must be added using the appropriate Setup Fees material selection under Exterior, Features. Mobile Manufactured Housing is not:
|
| 
A manufactured home is a single-family house constructed entirely in a controlled factory environment and built to the federal Manufactured Home Construction and Safety Standards (better known as the HUD Code). Multi-wide starter manufactured homes are basic residential structures that consist of two or more single units that are joined together on site to make one living unit. The assembled homes are typically 24’, 28’, or 32' wide and can be as long as 80' (42' and 50' are typical though). Distinguishing characteristics of the starter homes are:
Once delivered, the homes need to be bolted together, set on piers or a basement, and have the water, sewer, and electrical connected. If more than one story, a crane is used to stack one unit on top of the other. Additional services are often done when the home is first set such as installing skirting connecting the air conditioner and removing the hitch and wheel assemblies. They are built on steel undercarriages with necessary wheel assemblies for transporting to permanent or semi-permanent sites. The wheel assembly and hitch can be removed once the home has been set. The steel undercarriage, however, will remain intact since it is incorporated into the framing of the home. A red, permanently attached, HUD label must me attached to each transportable section of the home. The label is found on what would be considered the rear exterior of the home when in transit. Note: Setup, delivery, and installation fees are not included in the costs. They must be added using the appropriate Setup Fees material selection under Exterior, Features. Mobile Manufactured Housing is not:
|
Related topics:
Enter the year this section of the residence was built, using a full four-digit year between 1799 and the current year (for example, 1964, not 64).
Note: If the year built is before 1930, you must also select Construction Type: Standard or Pre-1930 (or Std/Vintage Combo if configured). If the year built is between 1930 and 1940, you must also select Construction Type: Standard or Pre-1940 (or Std/Vintage Combo if configured).
To select the construction type for each section of the home, click the drop-down arrow and select the appropriate option from the following choices:
- Standard: This option calculates replacement cost using modern construction techniques and materials.
- Vintage: Available for homes built before 1940, this option calculates reproduction cost using the type of building options for homes built before 1940.
- Standard/Vintage: Available for homes built before 1940, this calculates the cost using modern (standard) construction techniques, but loads the appropriate pre-1940 or pre-1930 material selection assumptions. This choice is only available on systems with a custom configuration.
Note: This option is not available in the Advanced Entry Method.
Related topics:
This is the total number of stories for the home.
Enter the number of floors above ground. You can change the number of stories for some styles, in which case the Number of Stories field is enabled. For other styles, the number of stories cannot be changed, so the field remains disabled.
Note: For styles such as bi-level, tri-level, split level and raised ranch, the number of stories will automatically be set during calculation.
If there is a fraction of a story, enter it as a decimal, not as a fraction (for a 1-1/2 story home enter 1.5, not 1 1/2). For a Cape Cod with an upper floor smaller than the first floor, enter 1.5 or 1.75, depending on the amount of finished area on the upper floor.
Finished living area is the total floor area (total living area) of a home (main and wings) less any built-in garage area and any bi-level unfinished lower level area. Finished living area is used to load the finish material selections for the home.
Example 1:
If you have a 2,400 sq. ft. 2-story home with no built-in garage and no unfinished lower level area (home is not a Bi-level, Raised Ranch or Split-Foyer), you have 2,400 sq. ft. of finished living area.
2,400 sq. ft. total living area minus 0 sq. ft. built-in garage, minus 0 sq. ft. of lower level unfinished area equals 2,400 sq. ft. of finished living area.
Example 2:
If you have a 2,400 sq. ft. Bi-level home with a 400 sq. ft. built-in garage, you have 2,000 sq. ft. of finished living area.
2,400 sq. ft. total living area minus 400 sq. ft. built-in garage equals 2,000 sq. ft. of finished living area.
Example 3:
If you have a 2,400 sq. ft. bi-level home with 420 sq. ft. unfinished lower level (35% unfinished lower level), you have 1,980 sq. ft. of finished living area.
1200 sq. ft per level, so 1,200 minus 420 sq. ft. of lower level unfinished equals 780 sq. ft. of lower level finished.
1,200 sq. ft. upper level total living area plus 780 sq. ft. of lower level total living area (finished), equals 1,980 sq. ft. of finished living area finished living area.
Example 4:
If you have a 2,400 sq. ft. bi-level home with a 400 sq. ft. built-in garage and 400 sq. ft. of unfinished lower level (50% unfinished lower level), you have 1,600 sq. ft. of finished living area.
1200 sq. ft per level, so 1,200 minus 400 sq. ft. built-in garage = 800 sq. ft. of lower level. 800 sq. ft. of lower level times 50% unfinished lower level = 400 sq. ft. of lower level unfinished area and 400 sq. ft. of lower level finished area.
1,200 sq. ft. upper level total living area plus 400 sq. ft. of lower level total living area (finished), equals 1,600 sq. ft. of finished living area finished living area.
The total living area is the size of the main home plus each section/wing being entered (in square feet) based upon the exterior dimensions. When entering sections/wings, TLA should be entered individually for the main home as well as individually for each section/wing, not as a summarized value in the main home section.
Enter the square feet of the total living area.
Note: When calculating the total living area:
Include:
- Area for all floors
- Area for built-in garages
Do not include:
- Area for basements (which are included using the % Basement field)
- Area for porches, breezeways, or decks
- One-story attached garages (all of which are included in Attached Structures)
- Area for unfinished attic (which does not meet code for living area, and does not have adequate roof pitch/slope or ceiling height to qualify as a quarter, half or three-quarter story)
- Area for finished attic
Note: To enter the total living area for mobile-manufactured homes, use the actual dimensions (length x width of the box) not the dimensions from the hitch tip to the end of the unit. Avoid using the dimensions on the HUD label, because they are the nominal dimensions from the hitch tip to the end of the box. Using this as the total living area for the home could result in additional living area that does not exist, thereby causing overvaluation of the home.
This is the vertical distance from the top of a floor to the top of the next floor. This is also known as story height or floor-to-floor height. Enter the percentage of the home (or section of the home if it has wings) for each different wall height.
Note: Measuring from the top of the floor to the top of the next floor adds the joist area into the calculation, which will make the exterior wall size and area correct.
Enter a percentage between 0 and 100.
RCT automatically sets the wall height of the home (or each section if the home has wings) based on the year built. If you want to set the wall height yourself, enter the percentages in the Wall Height section.
Example: In a 2 story home, if the first floor is 10’ high and the second floor is 8’ high, the entries are:

Note: The total of all wall height percentages should equal 100%.
Use this option to enter the perimeter or select the shape of the home.
Using the option buttons, click a perimeter option then either select the applicable shape or enter a linear footage. The options are:
- Calculate Using Shape: Select this option if you want the system to automatically calculate the perimeter based upon the shape of the home or section, then select one of the following shapes.
- Measured Perimeter: Select this option if you want to enter the actual perimeter of the home (or the section) then type the ground floor perimeter (in linear feet) in the perimeter field.

Square

Rectangular

Slightly Irregular

Irregular

Very Irregular
Related topics:
 Section Type (if Advanced Entry is selected)
In addition to being able to divide the home into the main home and one or more sections, you can also specify the section type (for example, whole house, vertical or horizontal, basement, garage, and so on). By using the horizontal section choices, you can identify whether or not a section includes the ground floor of the building (this means that the foundation, roof area, and perimeter can be calculated based upon the ground floor area of the specific section).
Example: For a 3 story house with a horizontal section for each floor, enter the following section types:
Main Home: Horizontal Ground Floor
Section 1 (Second Floor): Horizontal Upper Floor
Section 2 (Third Floor): Horizontal Upper Floor
Use the drop-down list to select the applicable section type option. Note: This option is only available in the Advanced Entry method.
 Coverage Type (if Advanced Entry is selected)
For individual sections, you can specify whether the cost for that section is part of coverage A or coverage B in the policy.
- Coverage A (dwelling) is the part of the dwelling policy that covers the dwelling and attached additions (for example, screened porches and breezeways, attached garage, etc.). Coverage A also covers the materials and supplies for the construction, alteration, or repair of the residence.
- Coverage B (other structures) is the part of the dwelling policy that covers unattached structures like private garage or a tool shed. The coverage limit is 10% of coverage A.
When applicable, use the drop-down list to select a coverage option.
Related Topics:
Use the materials screen to add or edit building materials for the valuation. There are three different ways to add new features or materials.
To add a feature or material:
- In the text box next to Add a feature or material, type the name of the material or feature that you want to add.

As you type the name, a drop-down list displays materials that match what you type.
- Select the desired item from the list then enter the unit of measure.

- Click Add. The material or feature will be added to the materials page.
- After you add the material, the Valuation Total pane will indicate that the valuation data has changed. Click Calculate to update the totals.
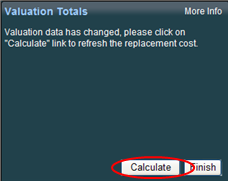
 Add or edit from the materials pane:
To add or edit from the materials pane:
- Click the edit icon in the material system that you want to edit.
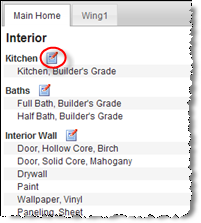
The screen expands to show options for editing existing materials or adding new ones.

- To edit an existing material or feature select a feature from the drop-down and enter the new quantity.

- Click the Save icon (
 ) to save the change.
 - To delete an existing material click the delete icon (
 ) next to the material.
 - To add a new feature or material, select the material from the drop-down box. Select the desired item from the list and enter the quantity.
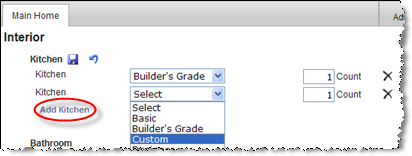
- Click the Save icon (
 ) to save the change.
 - To exit the editing screen without saving, click the Cancel icon (
 ).
). - After you add the material, the Valuation Total pane will indicate that the valuation data has changed. Click Calculate to update the totals.

Note: If you are in the Kitchens or Baths section a wizard is available to help you select the correct feature.
 Add a feature or material from the Edit Materials dialog:
To add a material or feature from the Edit Materials dialog:
- On the materials pane, click Edit.

The Edit Materials dialog appears.
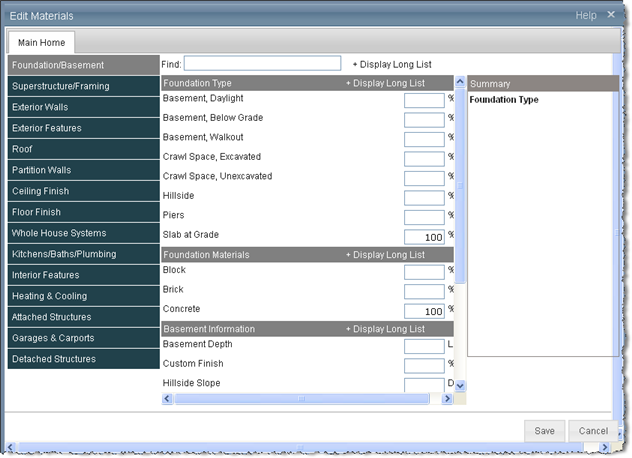
- Select a material system from the list on the left side of the dialog.
- Select the desired material and enter the quantity.
- Click Save when finished.
- After you add the material, the Valuation Total pane will indicate that the valuation data has changed. Click Calculate to update the totals.

Note: If you are in the Kitchens or Baths section a wizard is available to help you select the correct feature.
Related Topics:
Kitchen and bath wizard
